 Motorcycle Parts and Accessories
For Japanese Brand
Bikes
- Accessory Items
- Apparel for Bikers
- Body Parts
- Brake Parts
- Controls
- Chassis
- Liquids
- Drive Parts
- Electrical
- Exhaust Parts
- Fuel System Parts
- Gaskets and Seals
- Motor Parts
- Shop Tools
- Windshields
- Gift Shop
- Ebay Store
- Tools and Tips
- SPECIAL AREAS
- Chopper Stuff
- Sport Bike Stuff
- Cruiser Stuff
- Deals

This is a basic guide on how the typical master cylinder comes
apart and how to properly rebuild it.
Read the entire section before attempting to do a rebuild as it is
not set up as a step-by-step instruction manual.
It is also based on a Honda GL1100 '83 master cylinder and your
actual parts and order of installation may differ
slightly for other makes, models, and years. It is meant to show you
how this is done so you can determine
yourself if you have the skill and/or tools to do this sort of job
yourself.
We hope you can gain some useful information and ultimately save
some money!


Basic tools needed are:
- Good quality, long reach snap ring pliers.
- #2 Phillips and med size regular screwdrivers
- A scribe or ice pic style tool.
- Needle Nose Pliers
- Silicone spray lube
- Brake cleaner or carb cleaner
- Various hard bristled round and regular brushes
**************************************************************
Next familiarize yourself
with the master cylinder.
Master cylinders consist of two basic
parts.
The main master cylinder piston workings that could also
be called the pump, and the reservoir
where the fluid is held. This info can be used for almost
any brand of master cylinder and for front
or rear styles. Some have remote reservoirs and some have
solid reservoirs that are part of the pump body.
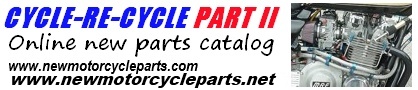
For our purposes we will be rebuilding a master cylinder from a
'83 GL1100. This was chosen due to
having the removable reservoir so we could also cover replacing
the reservoir too.
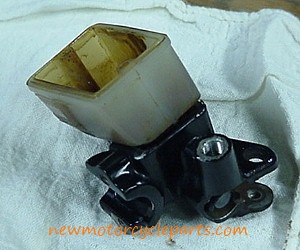
Dissasembly
Next we will take the master cylinder
apart. It is important in this step to make sure to lay out ALL
the parts just
as they were removed. Most rebuild kits do not come with any
sort of instructions. If the parts are layed out in
the order and the direction they were pulled, it will be much
easier for the final installation of the new parts.
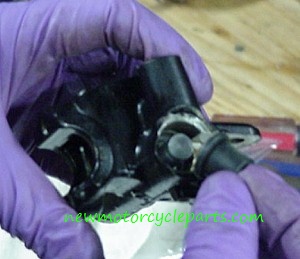
First thing to remove will be a soft rubber boot that covers the
outer part of the pump piston. On our example
model it was missing so we added a picture of the new one that
will be installed in one of the last steps.
Typically it can be just pulled out with your fingers of a pair
if needle nose pliers and set aside as the first removed part.
That will leave the exposed piston end and then you can see the
snap ring that needs to be removed next.
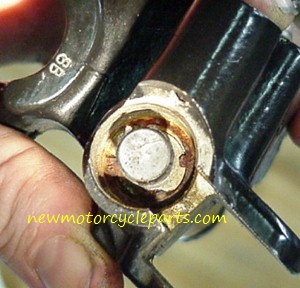 Exposed piston end showing snap ring that holds it in.
GO TO NEXT PAGE