 Motorcycle Parts and Accessories
For Japanese Brand
Bikes
- Accessory Items
- Apparel for Bikers
- Body Parts
- Brake Parts
- Controls
- Chassis
- Liquids
- Drive Parts
- Electrical
- Exhaust Parts
- Fuel System Parts
- Gaskets and Seals
- Motor Parts
- Shop Tools
- Windshields
- Gift Shop
- Ebay Store
- Tools and Tips
- SPECIAL AREAS
- Chopper Stuff
- Sport Bike Stuff
- Cruiser Stuff
- Deals

For the next
step we will be removing the snap ring that holds in the piston.
Use a pair of snap ring pliers that pinch inward or set your
universal set to pinch inward. Find the eyes
of the ring and remove the ring.
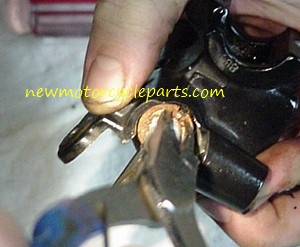
Once the
ring is removed the piston will slide out. This is the
point where you need to pay
attention to the direction and order that the parts are removed.
This will make installation
of the new parts much easier. Lay each part out in a line as
they are pulled out. You may
even want to take a picture to use for reference later in case
the parts get disturbed or
moved from the position you placed them in. Placing them on a
lightly colored or white
shop towel will help too.
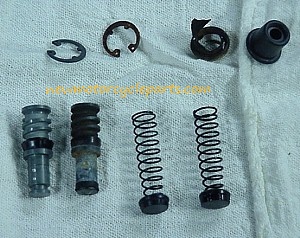
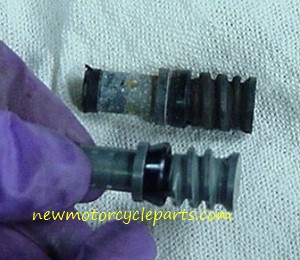
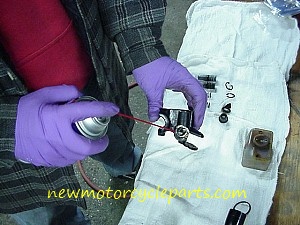
The
picture above shows the old parts pulled from the master
cylinder
along with the new parts ready for installation. Please keep in
mind the picture shows the parts
laid side by side, but you will want them laid out in order as
stated in the above instructions. Make
sure to compare all the parts to verify they are the same as
the ones removed. It is not uncommon
for master cylinders to have been changed to other models for
replacement. So, be sure to check
the parts carefully before the next step.
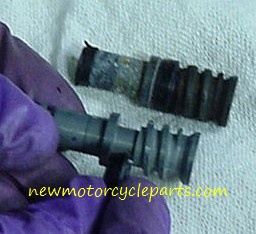
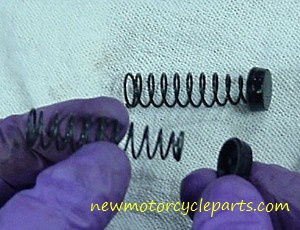
In the
picture above you will see the seal for the piston before and
after installation.
The first picture shows that the seal has a taper and should be
compared to the old seal before installation is made.
Installing the seal backwards will cause the master cylinder to
not work, so this is an important step.
After determining the proper direction use a good amount of the
silicone lube and slip the seal over
the piston and into place carefully. Do not use tools to do this
step so the seal does not get damaged.
Also check the piston for burrs before slipping the seal over it
so you do not damage the seal during
installation.
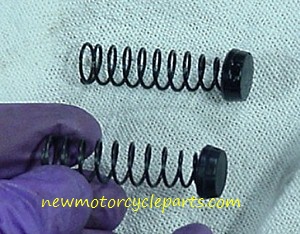
Installation of the end seal of the
return spring is shown in the picture above. There usually is a
taper at
one end of the spring that will determine which end of the
spring to put the end seal on.
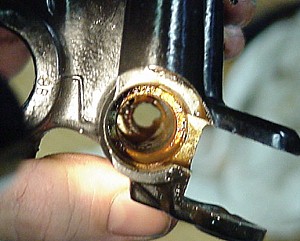
Next you
will want to inspect the bore of the master cylinder before
installing
the piston and related parts.
Clean the inside out thoroughly. Carb cleaner and brake cleaner
work best along with a hard bristled
round pipe brush. When the inside is clean check for scoring and
oxidization damage. Scoring is
excessive grooving to the bore from piston movement and
oxidization is the erosion of inside surface.
Both can cause the piston to not seal correctly. After this
process is done and you are confident the
master is undamaged, you will be ready for installation of the
piston and related parts.