 Motorcycle Parts and Accessories
For Japanese Brand
Bikes
- Accessory Items
- Apparel for Bikers
- Body Parts
- Brake Parts
- Controls
- Chassis
- Liquids
- Drive Parts
- Electrical
- Exhaust Parts
- Fuel System Parts
- Gaskets and Seals
- Motor Parts
- Shop Tools
- Windshields
- Gift Shop
- Ebay Store
- Tools and Tips
- SPECIAL AREAS
- Chopper Stuff
- Sport Bike Stuff
- Cruiser Stuff
- Deals

Removal and installation of
reservoir.
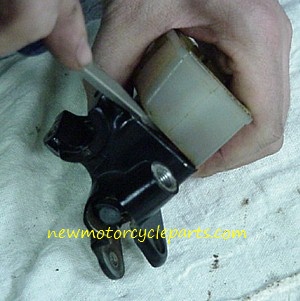
After the cap and diaphragm are removed
(lid assy) you will want to determine how the reservoir body
will be removed. Now keep in mind we are using a '83 Honda
GL1100 master cylinder as an example.
Not all reservoirs come off the same as this one and some are
simply part of the body. Some units will
have internal screws holding them to the master cylinder body.
We used this model because the removal
is not so obvious. In the picture above you will see the use of
a regular screw driver. Carefully slide the
screwdriver between the plastic reservoir and the metal body and
then pry towards the top and twist at
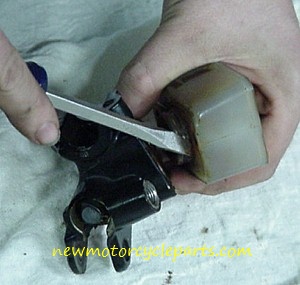
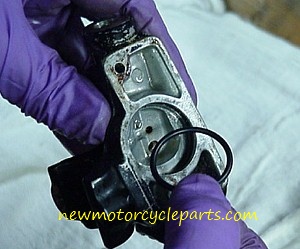
the same time. If you look at
the second picture it shows the incorrect way the
screwdriver is used. Pry the opposite direction. The
reservoir will pop loose from the base.
Be sure to apply the pressure under the base of the reservoir
and not too the metal edge so if any marks
are made they will not show after installation of the new
reservoir.
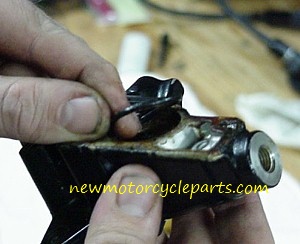
Once you remove the reservoir you will
find a o-ring installed in the base inside a groove. Remove this
part carefully. Sometimes it will be crusted in with old dried
brake fluid so the use of a scribe
(looks like a ice pic) will be necessary. Be sure not to scar or
scratch the sealing surface of the groove.
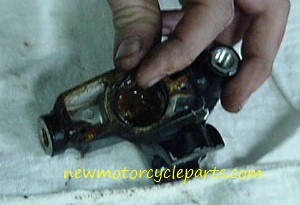
Clean the inside area thoroughly with carb cleaner or brake
cleaner. This cleaning job is best done before
you have installed the master cylinder piston and related parts.
Carb cleaner and brake cleaner could
damage the new rubber parts if saturated with the chemicals. Be
sure the groove is closely inspected
for any buildup or debris and thoroughly cleaned. A hard
bristled brush comes in handy here.
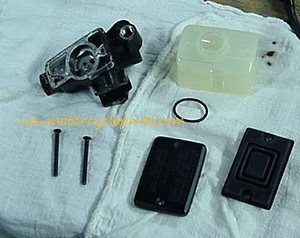
Same as before lay your parts out before
installation and compare to the old parts. Shown here are the
new parts ready for installation.
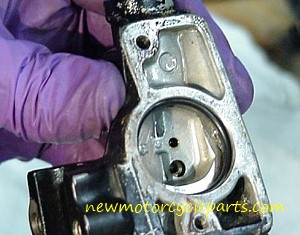
Above you will see the before and after
installation of the o-ring seal for the base of the master
cylinder.
This is the most important part of the installation of the
reservoir because it is the main seal for the base.
Check to make sure the o-ring sits in the groove uniform. If you
see any areas that are lumpy or
twisted, remove the o-ring and inspect the area of the groove.
There may be debris in the groove, buildup
you missed, or the o-ring may be twisted.
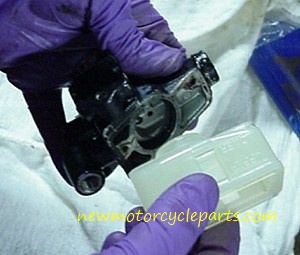
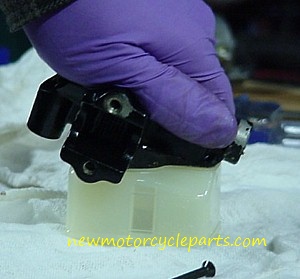
Next we are ready to install the
reservoir. First apply some silicone lube. Next, line up the
reservoir and
place the entire unit on a firm, flat surface as shown. Apply
firm pressure and push the master cylinder
down and snap it into place.
This pretty much completes the technical parts of the rebuild
and installation. The rest are the basic parts
like installation of the cap and diaphragm and screws for the
lid. Most of the additional info will be added
to our brake bleeding section that will soon be added to our
Tools and Tips section.
GO BACK TO INDEX